
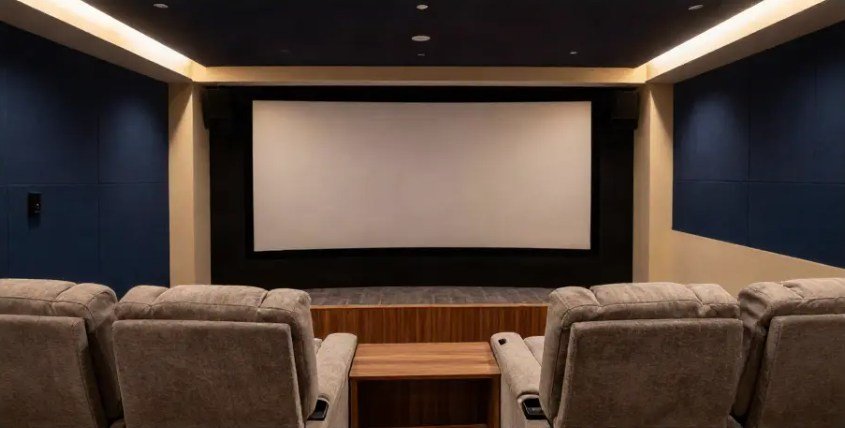
A dedicated media room is one of the few spaces in a home that has to perform before it can be judged. Layout, acoustics, and seating are settled early, in the same drawings as the wiring and the joinery. These are the design directions we return to most often when clients in Gurugram, New Delhi, and Noida ask for a home theatre that still reads as part of the house.
- Choosing a room, screen size, and sightlines for your space
- Acoustic panelling, controlled lighting, and concealed cable management
- Tiered seating, upholstery, and finishes that hold up over time
1. Choose the Room Before You Choose the Screen
The right room is a rectangle with one clear entry and no through traffic. A spare bedroom, a lower-ground level, or the far end of a long living room all work; a corridor-facing wall does not. Aim for an internal width of at least 3.6 meters and a ceiling above 2.7 meters. A deeper room lets you set a second row back without crowding the first.
Direction matters as much as size. Avoid stacking the screen against a west-facing glazed wall you cannot black out. If the room has a window you want to keep, plan the blackout layer into the joinery rather than hanging a blind over a finished wall.
2. Size the Screen From Viewing Distance and Sightlines
Screen size is a function of how far you sit, not the other way around. For a 120-inch screen, the ideal first-row distance is roughly 2.5 to 3 meters; the second row falls about 1.2 to 1.5 times the screen diagonal back. Set the bottom of the image at eye level for the seated viewer, which in practice means the screen center sits a little above seated eye height.
Sightlines decide the riser. If the second row cannot see the full screen over the first, the whole room fails. Draw the sightline in section before the platform is built, not after.
3. Treat Acoustics as Structure, Not Accessory
Acoustic treatment belongs in the build, hidden inside the architecture. Absorb the first reflection points on the side walls and ceiling, and diffuse the rear wall so the room does not sound dead behind you. Fabric-wrapped panels set flush into the wall read as an intentional finish; surface-mounted foam does not.
In NCR homes, where rooms often share a wall with a bedroom, plan isolation as well as absorption. A floated frame and resilient clips keep the low end from travelling through the structure. This is far easier to do before plaster than after handover.
4. Control the Light Deliberately
Flat overhead lighting ruins a media room. Use layered, dimmable circuits instead: a soft cove wash for circulation, low-level step lighting for the riser, and a dimmed task light for the console. Every circuit should reach near-zero without flicker.
Keep the palette deep and matte. Rich navy, charcoal, and warm cream absorb stray light and reduce glare from the screen. Matte finishes on walls and ceilings matter more than the exact color. Avoid polished surfaces anywhere the screen can reflect into a viewer’s eye.
5. Conceal the Cables and the Equipment
Cable management is a joinery problem, not an afterthought. Plan a dedicated riser and a low console that hides the media player, the receiver, and the streaming boxes, with ventilation built into the carcass. An adjacent niche can hold the AV rack out of sight while keeping it serviceable.
Route speaker runs and power in the same drawing as the paneling. Chasing a finished wall for a forgotten cable leaves a scar that no amount of paint hides.
6. Tiered Seating and Upholstery That Holds Up
Two rows on a shallow riser give the room its cinema proportion. Allow 90 to 100 centimeters of pitch per recliner so the seat can fully extend without touching the row ahead. Recliners suit long films; fixed lounge chairs suit smaller rooms and read more calmly.
Choose upholstery for the climate. Performance-weave fabrics and full-grain leather tolerate NCR dust and humidity far better than pale boucle or uncoated velvet. Where you want velvet for depth, keep it off the primary contact surfaces.
7. Finishes That Age Well
The finishes you notice least are the ones that last. Walnut veneer, honed stone, lime plaster, and tailored acoustic fabric all hold their character with a wipe and a vacuum. Metals should be brushed or darkened rather than mirror-polished, which shows every fingerprint in a dark room.
Darkness is a design asset here. Let the joinery, the paneling, and the lighting carry the room, and resist the urge to decorate it further.
8. Plan the Handover
A media room is commissioned, not just installed. The final stage is calibration: setting the projector or display, tuning the audio to the room, and testing every circuit and source before the client sits down for the first film. Build a snag list, resolve it, and hand over a room that works on day one.
This is where a single accountable team earns its place. When design, joinery, acoustics, and AV sit with one studio from brief to keys, the room is resolved on paper and on site, and the handover is quiet rather than eventful.
Designing a Home Theatre That Belongs in the House
Good home theatre interior design is less about spectacle than about control: the room you chose, the sightline you drew, the panels you hid in the wall, and the seat that still feels right after three hours. Get those decisions right and the technology disappears into a room that feels warm, settled, and entirely part of the home.
If you are planning a dedicated media room in Delhi-NCR, Alaya Spaces can take it from brief to keys, with resolved materials, fixed schedules, and in-house supervision throughout.